Week 0
Week 0 – Setup
Due Dates & Links
- Welcome Survey - Due 11:59pm (just before midnight) Monday September 26, 2022
- Week 0 Lab (Creating Github Page) - Due 11:59am (just before noon) Wednesday September 28, 2022
- Quiz 1 (will be released after class Monday) - Due 11:59am (just before noon) Wednesday September 28, 2022
Lecture Materials
Related Links
- About Git
- Github
- Github Pages
- Github Desktop
- Markdown cheat sheet
- What is Markdown?
- Git (You don’t necessarily have to install this on its own for your computer; but this is the link to the underlying tool called
git. It’s included in Github Desktop.) - Visual Studio Code
Key Definitions
- git repository: A folder that tracks the history of edits to its files
- Github repository: A git repository online, like a Google Drive folder with history
- Github pages: A service that takes a Github repository and builds a website from it (usually relying on conventions, like
index.md) - Markdown: A way to write plain text files with a little bit of formatting
- commit: A set of changes to a file or multiple files in a repository. A repository history is made up of commits
- git clone: A git action to copy a repository from one place to another (usually from somewhere like Github to our computer). Copies the contents of the folder and the entire history – the whole repository.
- git commit: A git action to take some changes we’ve made to files and turn them into a commit in the repository’s history
- git push: A git action to send commits from one place to another (usually from our computer to Github)
Lab Tasks
In this lab you’ll make a professional website for yourself where you can post your lab reports for the course. Please contact the instructor (jpolitz@eng.ucsd.edu) if for personal privacy or security reasons you do not want to publish a public web site, even under a pseudonym.
Motivation
Having a professional portfolio website for yourself can be useful in many, many ways. It’s a useful URL to put at the top of your resume/CV where potential employers can learn more about you. Lots of great work in CS is published only on someone’s personal page, or is at least most accessible there. Most CS faculty have such a page (just a few examples from new CSE faculty), for example.
Also, journaling and logging what you’ve learned is a powerful tool. Writing down what we’ve done and how we’ve done it, for an audience (real or imagined) other than ourselves, forces us to confront lingering misconceptions and cements what we learned in our memories. It’s also simply useful to refresh your memory later!
For these reasons, we’ll spend this lab creating a personal page, and then learning to write a blog post about what we learned.
git, Github, and Github Pages
Github (https://www.github.com) is a web service for storing and sharing code, along with a huge number of services surrounding that code. It uses a tool and protocol called git https://git-scm.com/ to store and retrieve that code. Github Pages https://pages.github.com/ is one of the services Github provides for publishing personal and project websites from your Github account.
This lab is a basic introduction to all of these. We will learn to use them in more detail as the quarter goes on; learning all that git, Github, or Github Pages has to offer could take months of practice!
Creating a Website with Github Pages
Below is a link to a video you can reference for help creating a Github pages site. CSE 15L Week 0: Github Pages Video
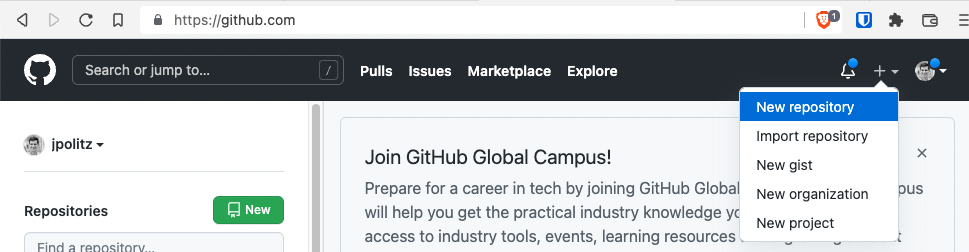
Make a Github Account
Go to https://www.github.com and create an account:
(If you already have an account, you choose if you want to use it or create a new one for this course).
You can choose any username you like for the account; it doesn’t have to be related to your legal or preferred name, though it can be and often is. Some people choose names related to their name, like me (my Github account is jpolitz). Others choose more abstract or whimsical names for their accounts, just like usernames on any other service. Feel free to do whatever feels right to you, and in any event, you can always change it later.
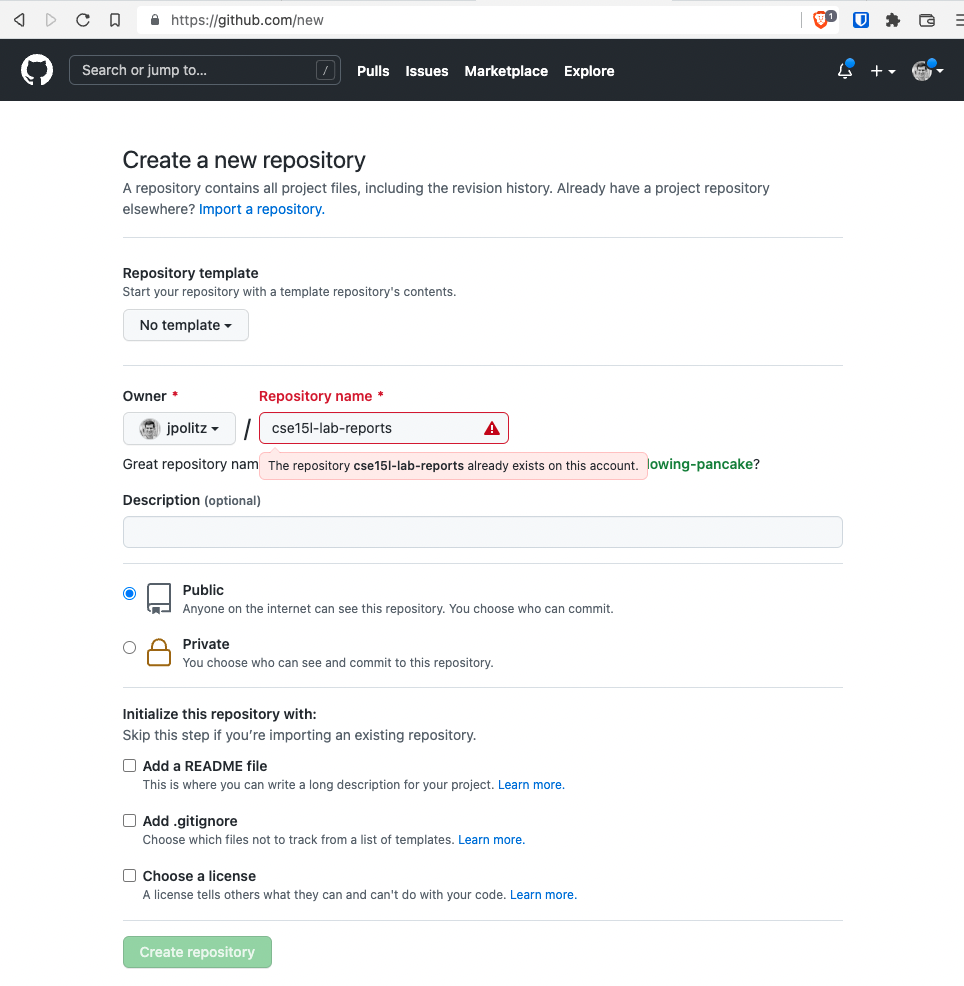
Create a Repository
Once you’ve created your account, we are going to create a new repository on Github. A repository is a folder or directory with an associated history of changes that were made to the files within it. In this sense, a repository on Github has some similarities to a folder in Google Drive; the differences are mainly in the level of control we get in managing that history of changes.
Name the repository cse15l-lab-reports (in my screenshot it looks like the name is taken because I made it before taking the screenshot; it will be green and OK for you). Leave the other settings as they are, and click “Create Repository” at the bottom.
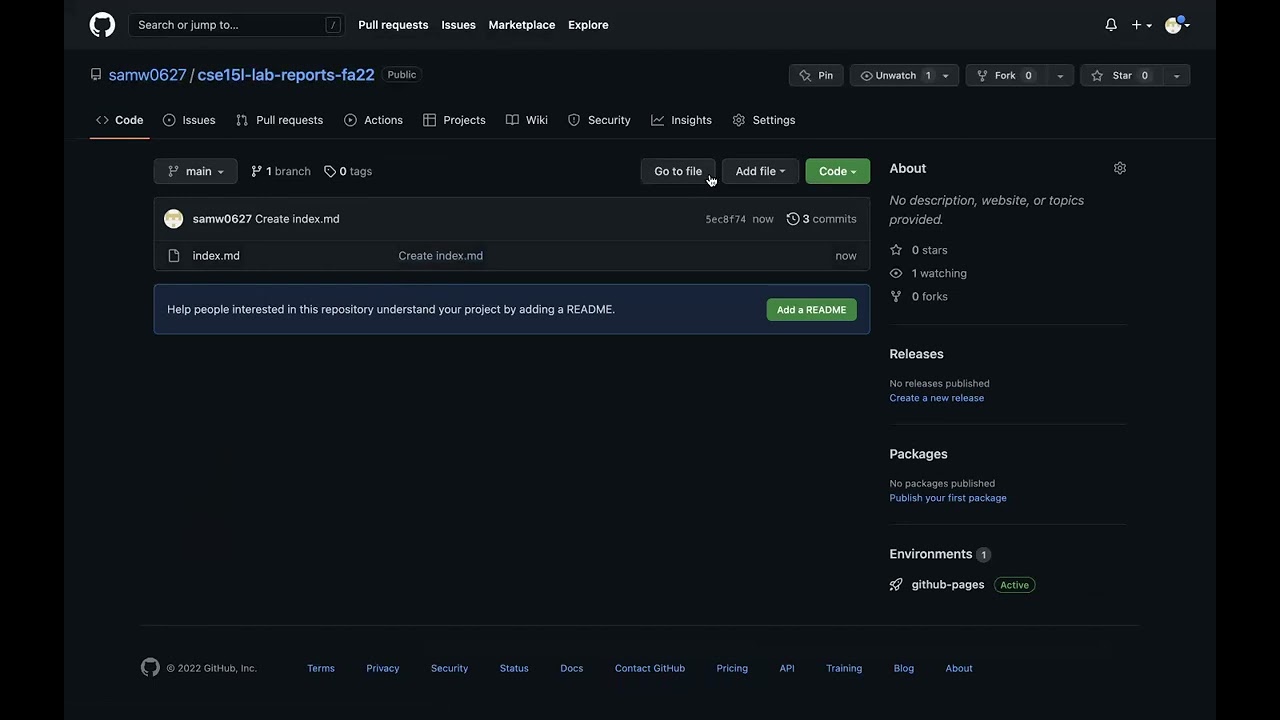
You should see a screen like this (but with your username):
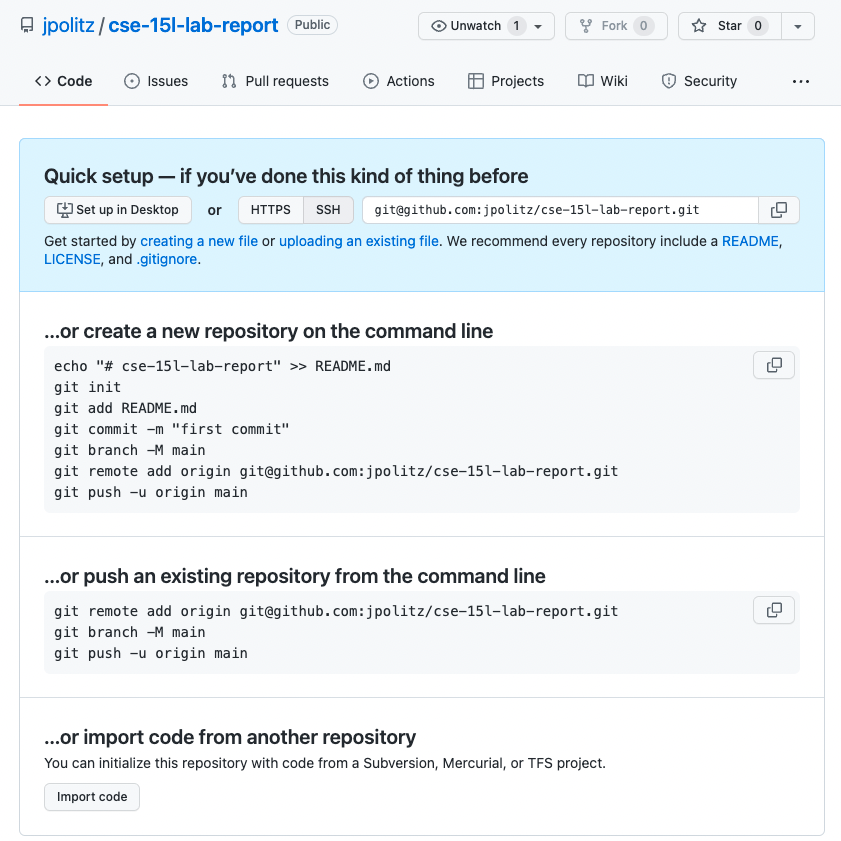
Click the “Create a new file” link (small, in blue, beneath the “Set up in Desktop” button). Make a new file called index.md, and put some text in it (whatever you like).
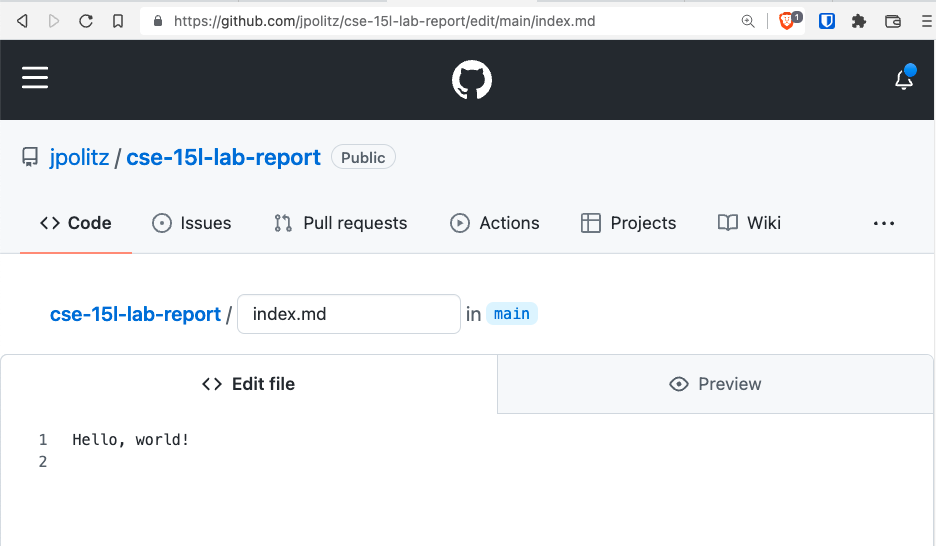
Scroll down to the bottom of the page and click “Commit new file”. You should see a view of your repository that now lists a file called index.md.
You have a public Github repository with some text in it! You can copy the link from your browser and send it to your friends and family to view!
Making a Pages Site
Next, click on “Settings” at the top of your repository, and then choose the “Pages” option in the sidebar:
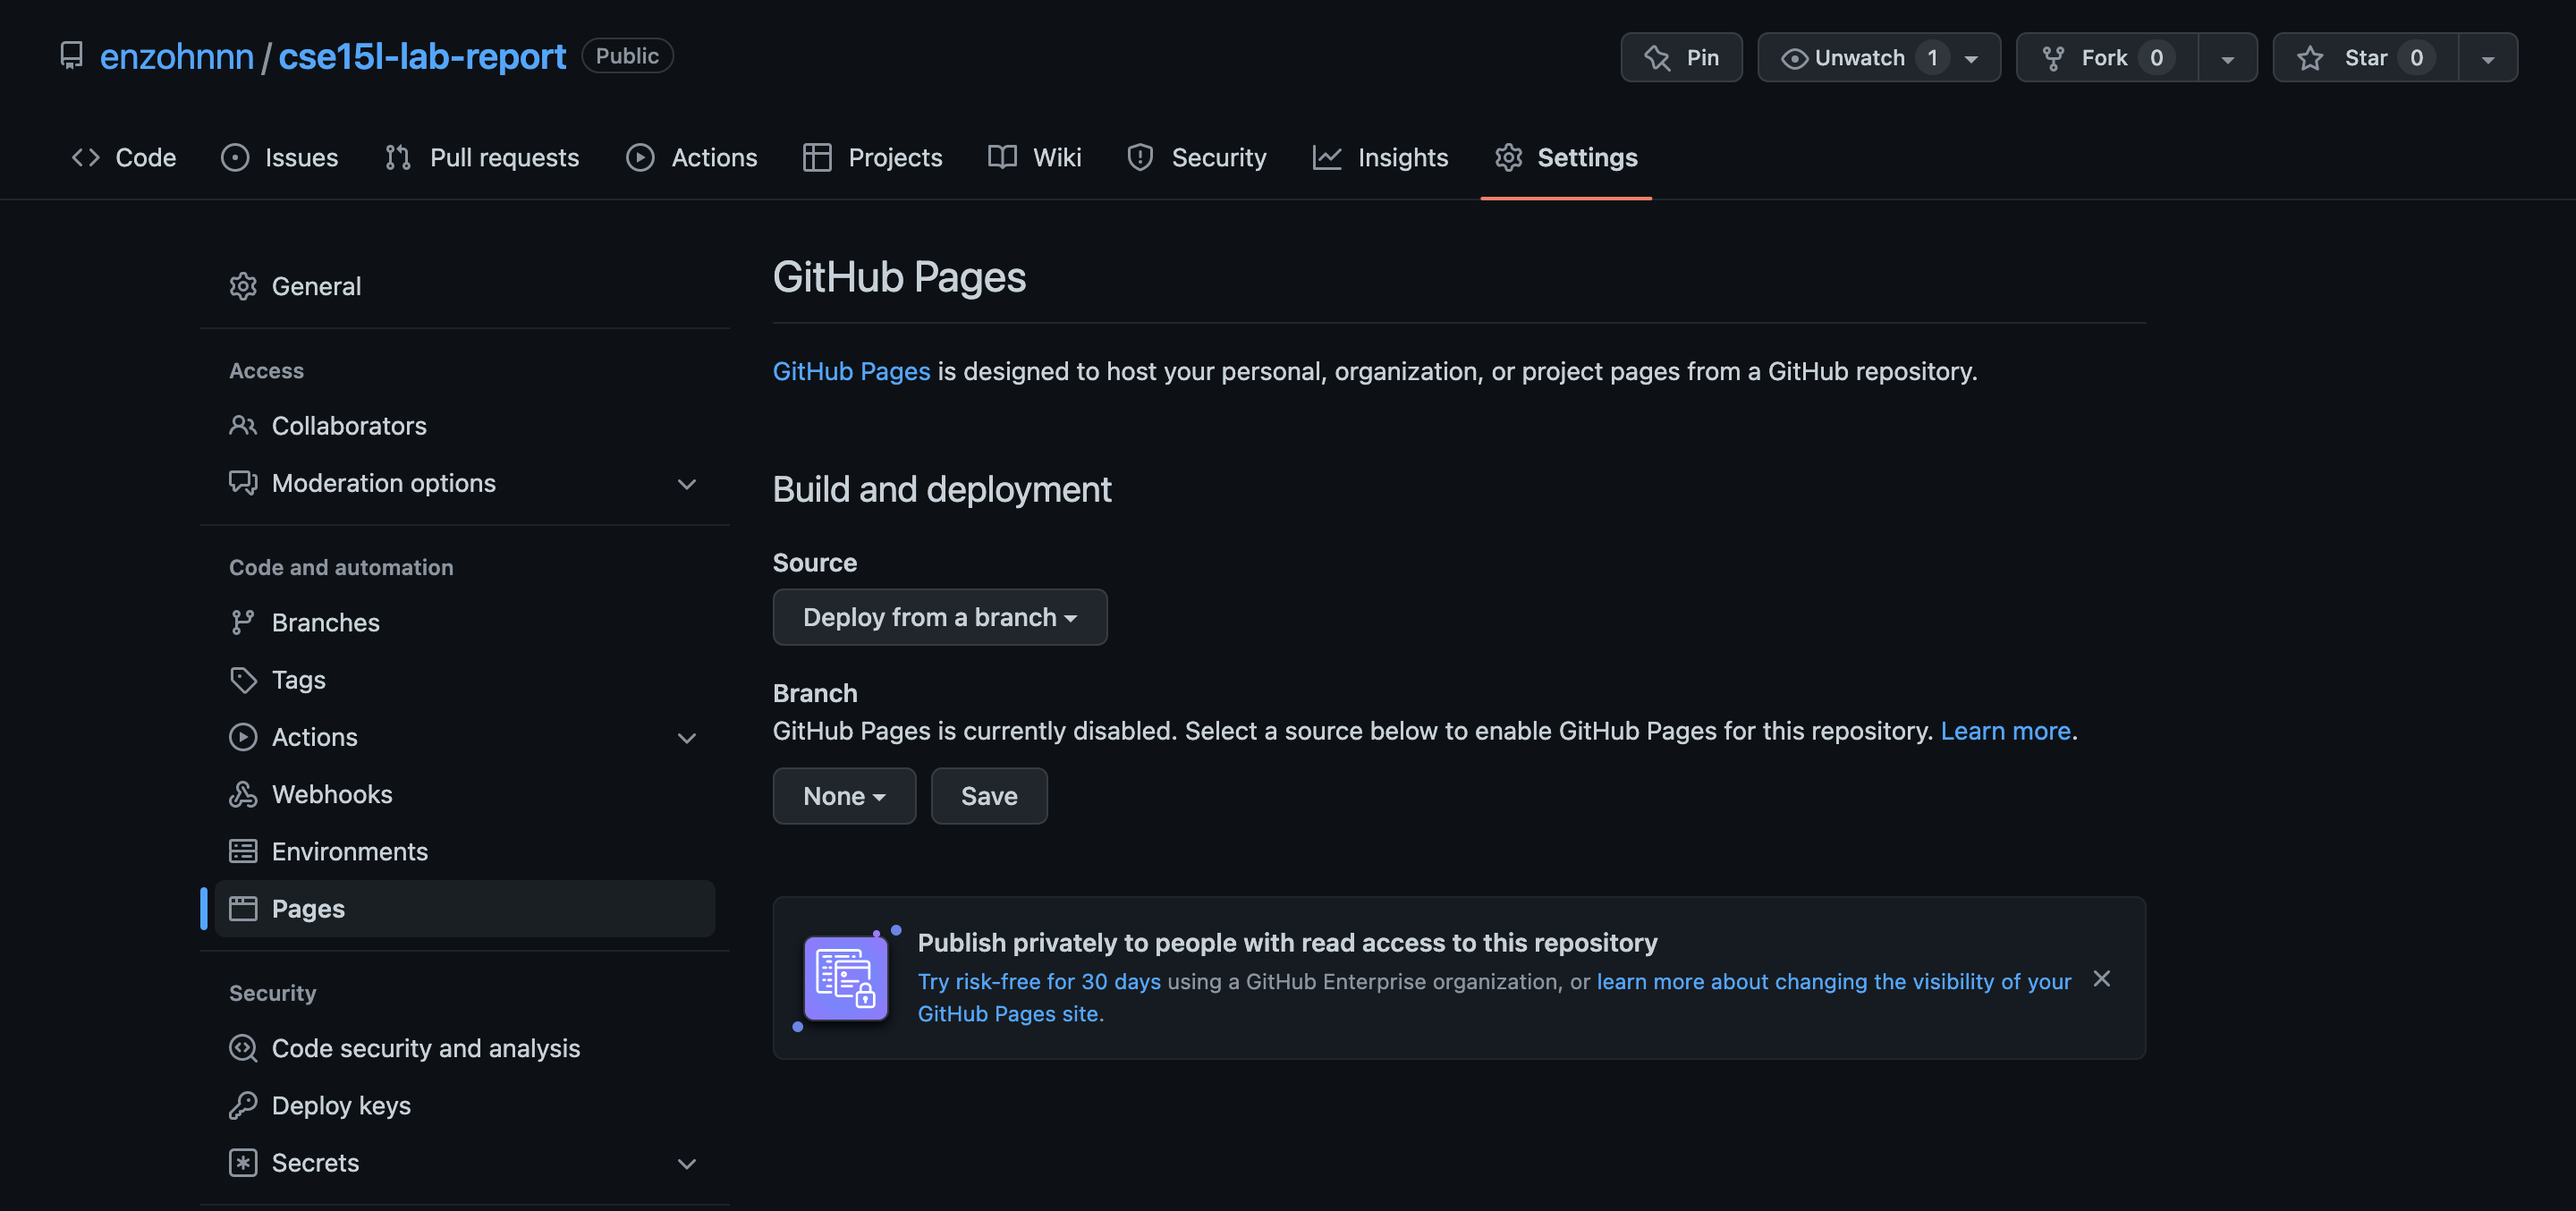
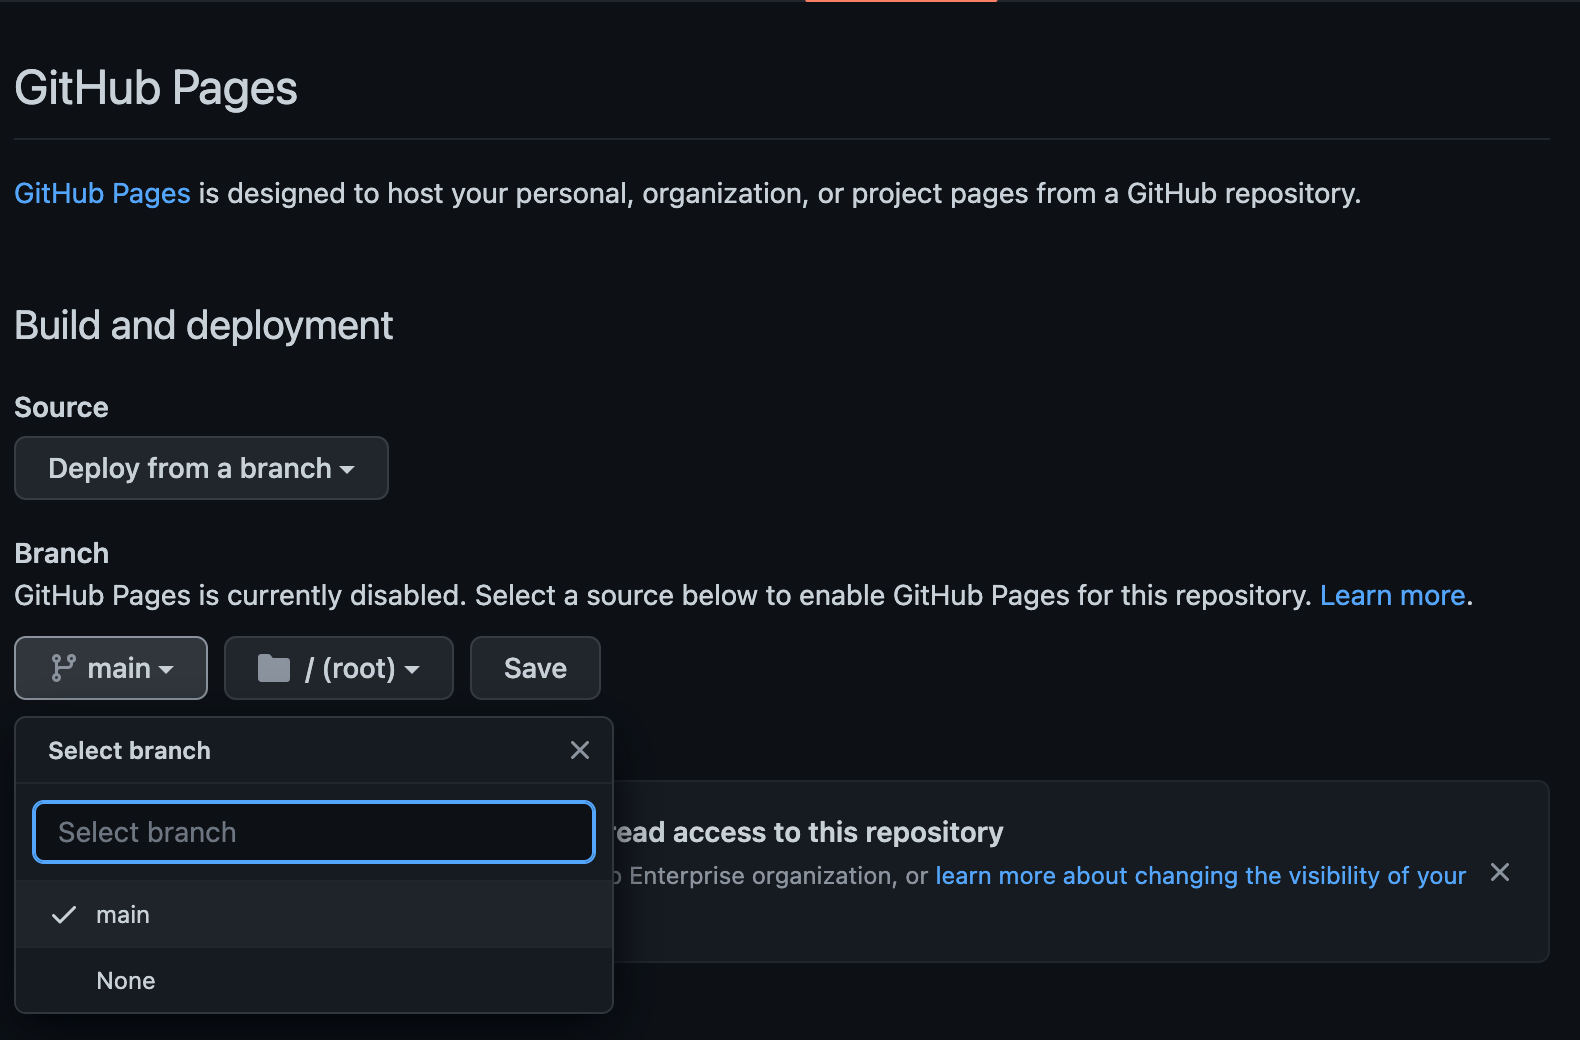
Choose main as the source for Github Pages, and click “Save”.
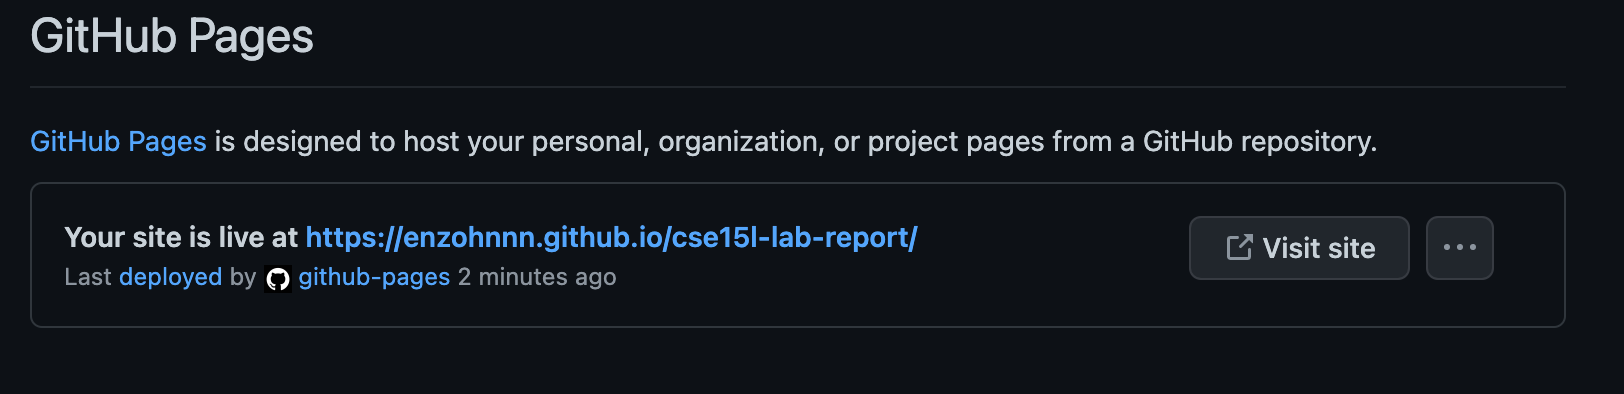
At the top it’ll say “GitHub Pages source saved”. Wait a bit and refresh the page. Eventually you’ll see a message that says “Your site is live at <url here>.” (This can take a few minutes!) Click the link that’s shown there; at first it will say the page isn’t found. Wait a few minutes, then refresh the page. Then you should see the text you wrote show up on a page like this:
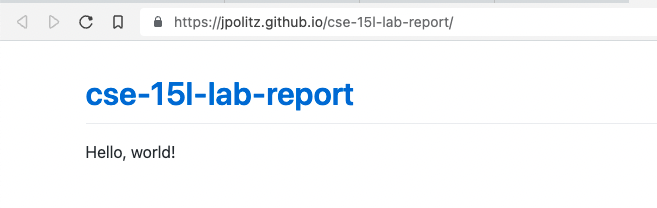
Note that in addition to seeing your file at, e.g, https://jpolitz.github.io/cse-15l-lab-report/, you can also see it with index.html added to the end of the URL: https://jpolitz.github.io/cse-15l-lab-report/index.html (Try it!). Add another file to your repository with any name you choose, but end it in the extension .md. Can you use this idea to see that file?
Editing Markdown
The .md extension stands for “Markdown,” which is a particular text format used for writing. There are many good documents on the web. A good cheat sheet and explainer are here:
Skim both of those documents, then try to use some of the elements described in the cheat sheet in your index.md file. How do some of the different formatting options show up when you use them? Are any surprising?
You should now have:
- A repository with at least two files (
index.mdand another one you made up) - In one of those files, a use of each kind of basic Markdown syntax
- A page that shows the rendered version of your Markdown text at a public URL
Congratulations – you now know how to make a (simple), public-facing website with basic formatting! You can share the link to your page with anyone in the world with an internet connection, and they can see your page.
(Fun fact: the page you are reading is written in Markdown and uses Github Pages!)
Editing Offline
So far, we’ve suggested that you make all your edits in your web browser using Github’s tools for creating new files and editing existing ones. However, this is a remarkably inefficient workflow, because each edit can take a few minutes to show up. Much better would be to use an offline tool, like Visual Studio Code or another editor, that can give better quick feedback as you work.
To edit offline, we need to be able to (a) download the repository to our computer, (b) edit the files, and (c) upload the changes back to Github. Github will re-render all of the Markdown into nice web pages for us each time we re-upload.
Cloning with Github Desktop
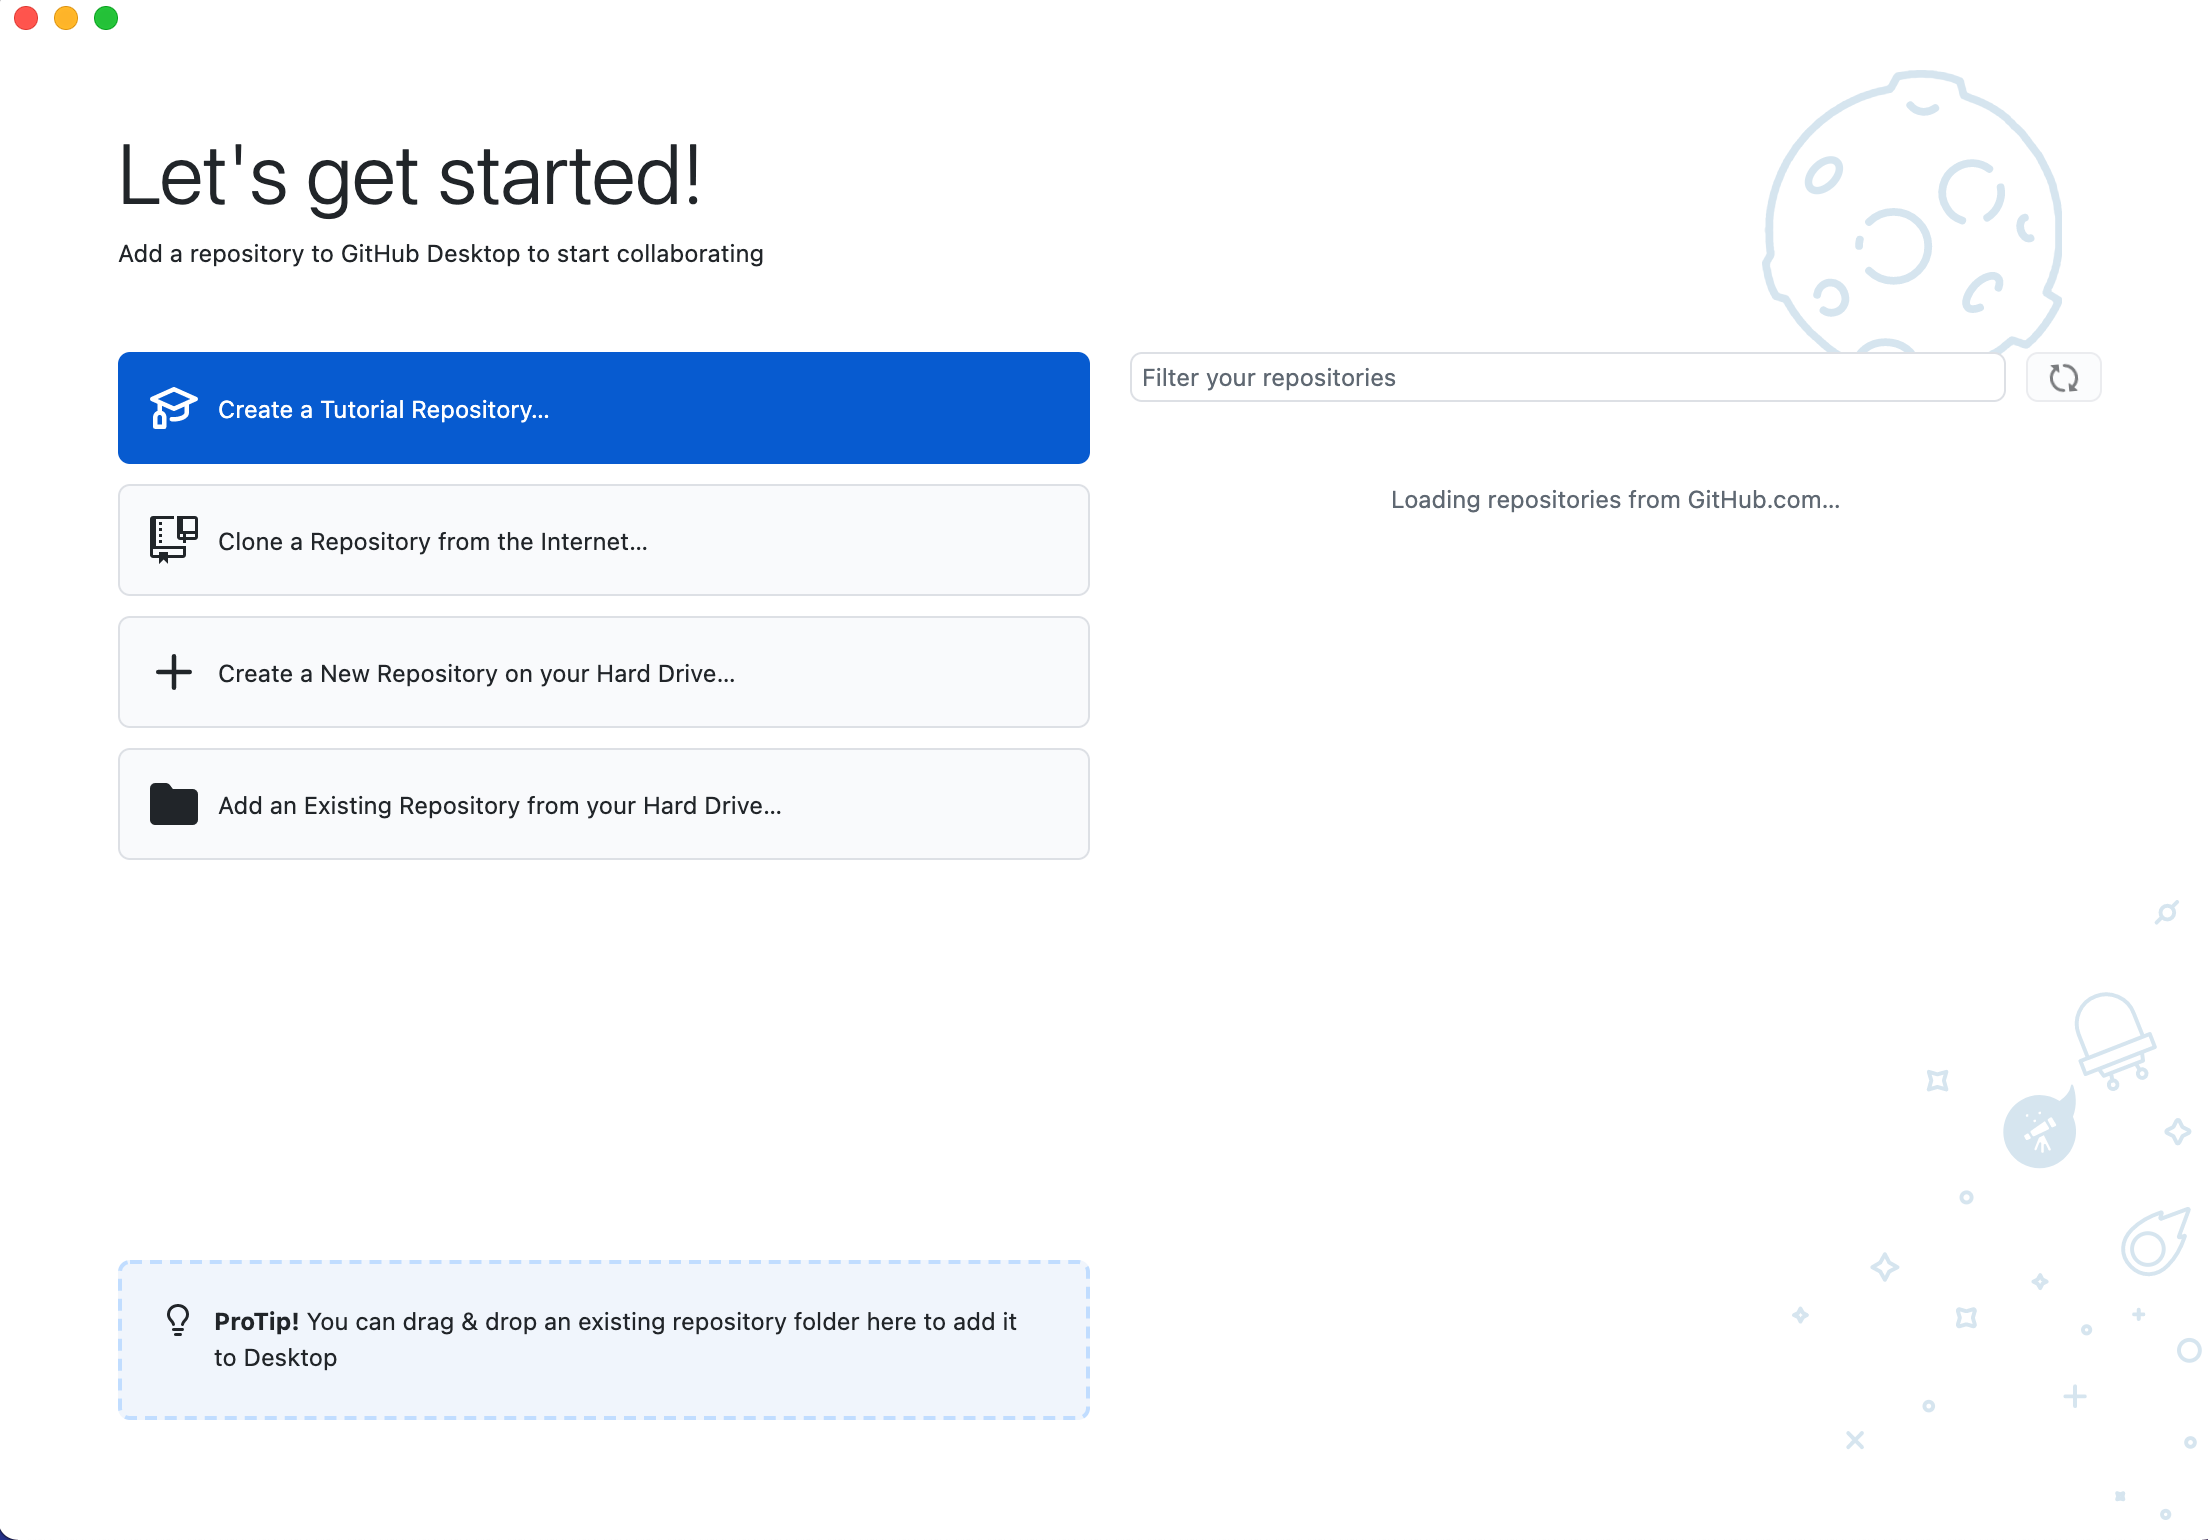
There are many ways to download the code from your repository and upload changes. We will use Github Desktop to do this today, and see other options in the future. Even if you have some other preferred way to do this that you’ve used before, please do follow the tutorial! You may learn something new and useful.
Download the Desktop Client for Github. Install it, and log in with your Github account. The startup page should look something like this:
Then, you can get the code from your repository in one of several ways:
- On the repository page, there is a
<> Codebutton; you can click on that and choose “Open with Github Desktop” - From Github Desktop, you can choose “Clone a Repository from the Internet” and then choose your repository
You’ll see a message about cloning, and then see this page:
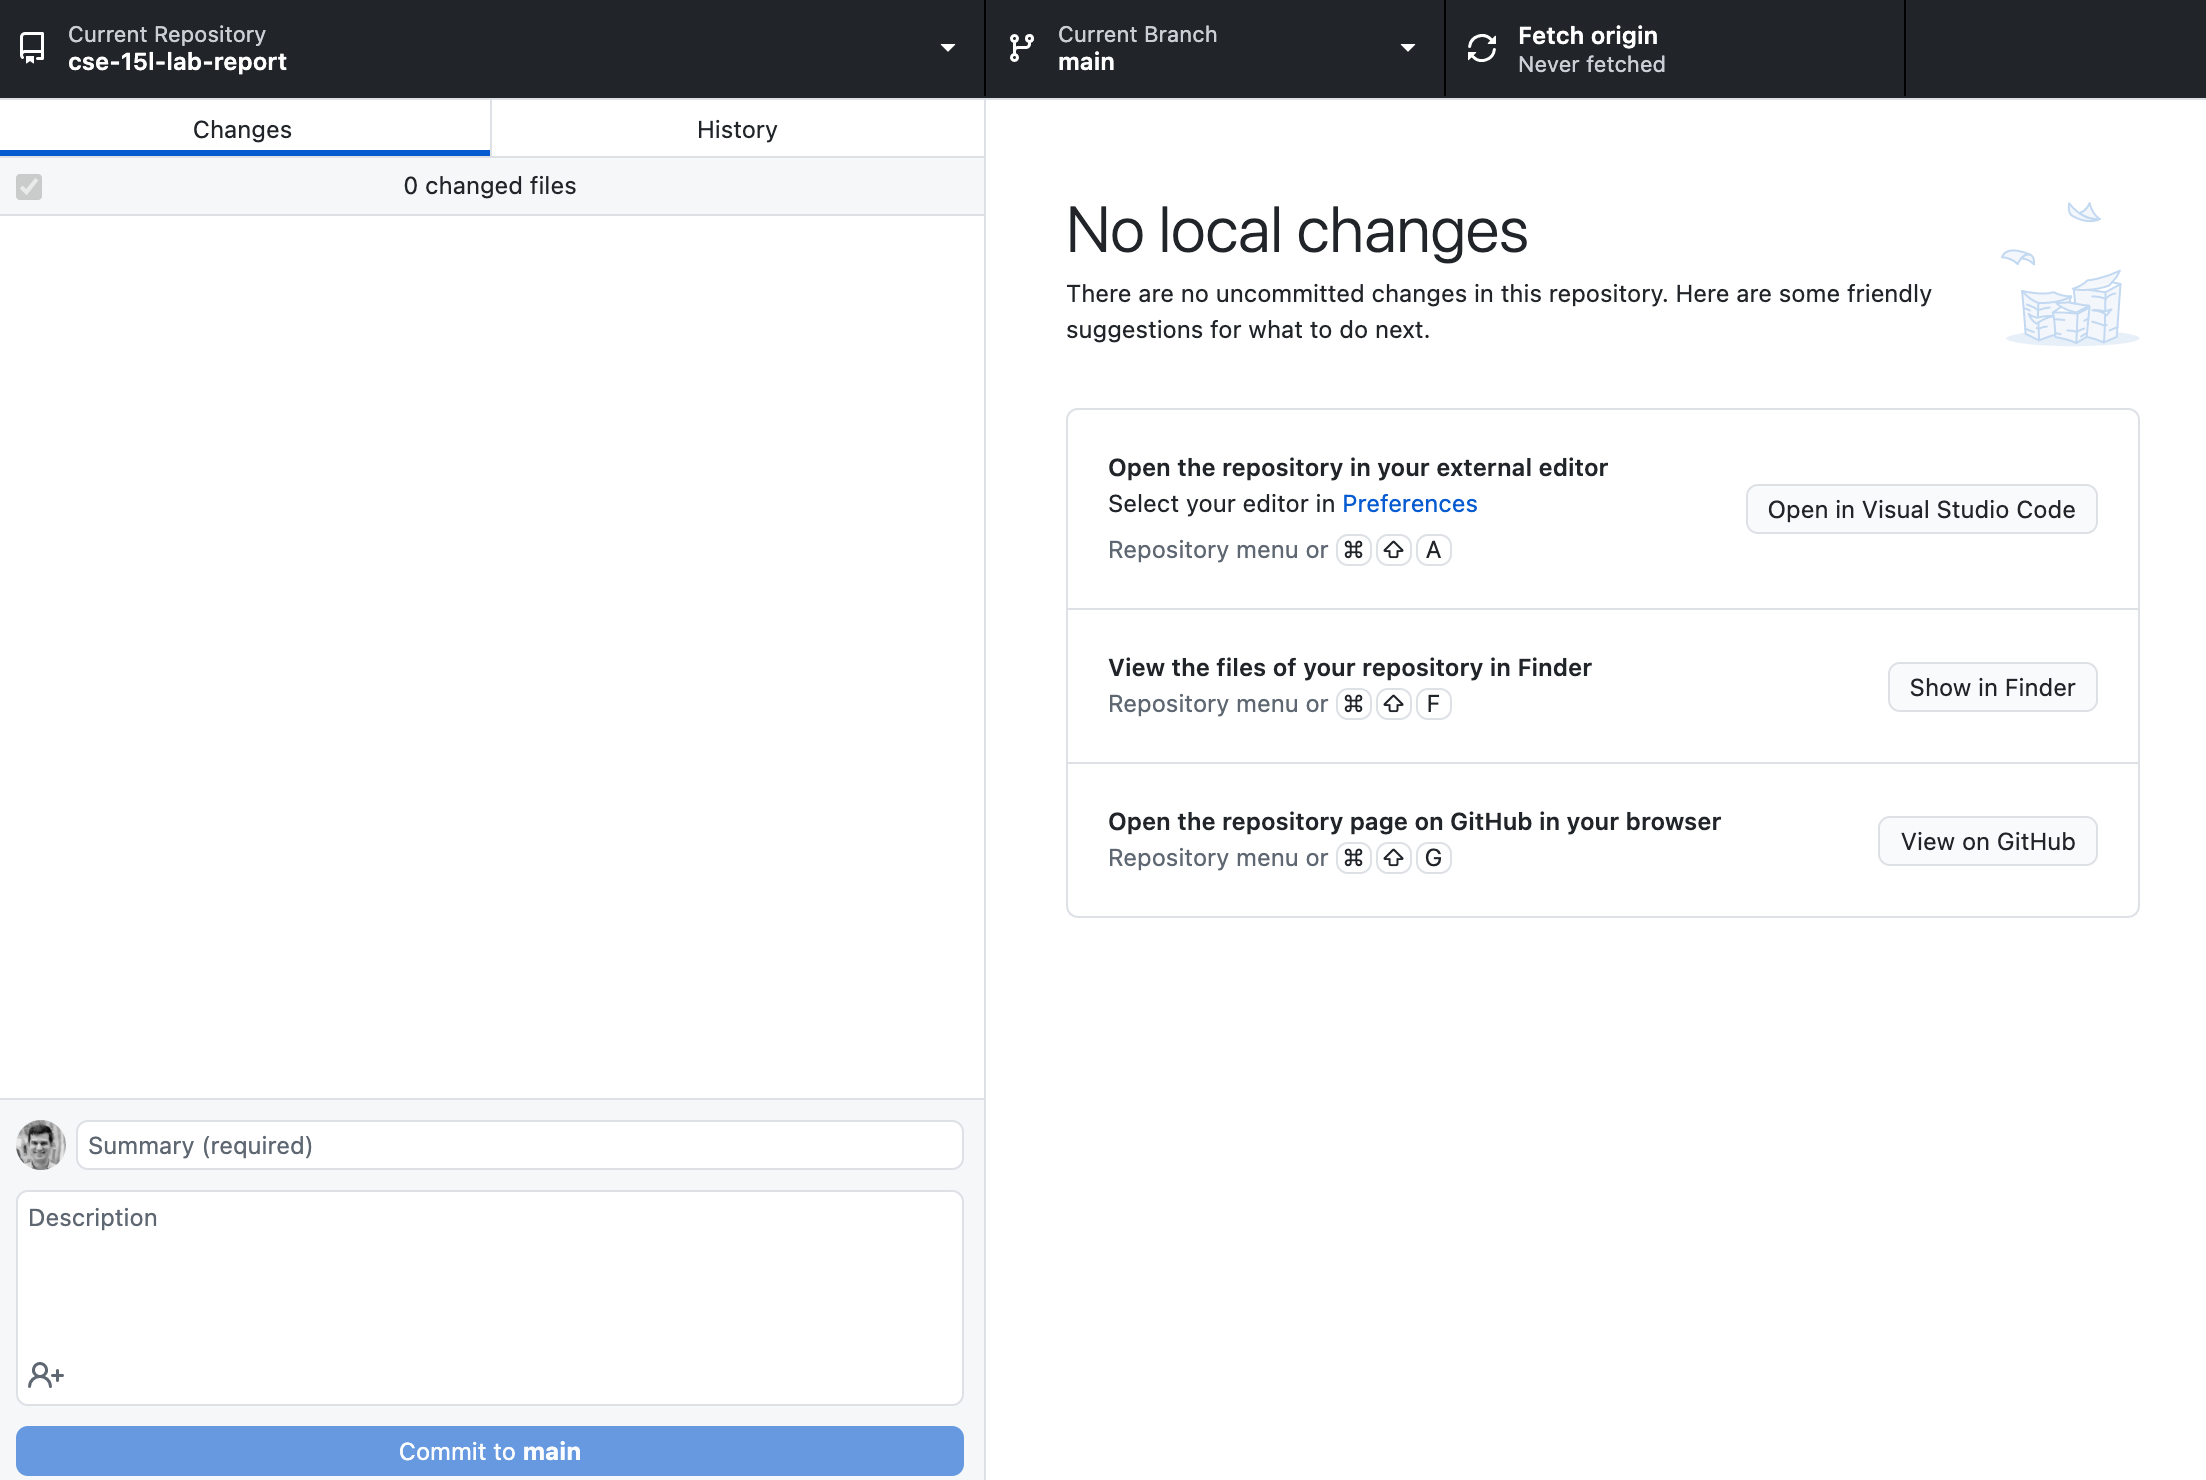
One thing that I often find a little surprising about this page is that it doesn’t list any files – index.md is nowhere to be found here! This is because Github Desktop (and the underlying tool, git) are all about tracking and recording changes; we won’t see much in this interface until we make some edits or new files.
Install VSCode
If you don’t already have it, go ahead and install Visual Studio Code. It is a powerful and free source-code editor that we will use throughout this class. Features include support for debugging, syntax highlighting, intelligent code completion, snippets, code refactoring, and embedded Git.
Editing (Markdown) in VSCode
A good way to make edits is to use the convenient “Open in Visual Studio Code” button. This will open a VSCode window in the directory you just cloned. If you click it, you should see a fresh window like this:
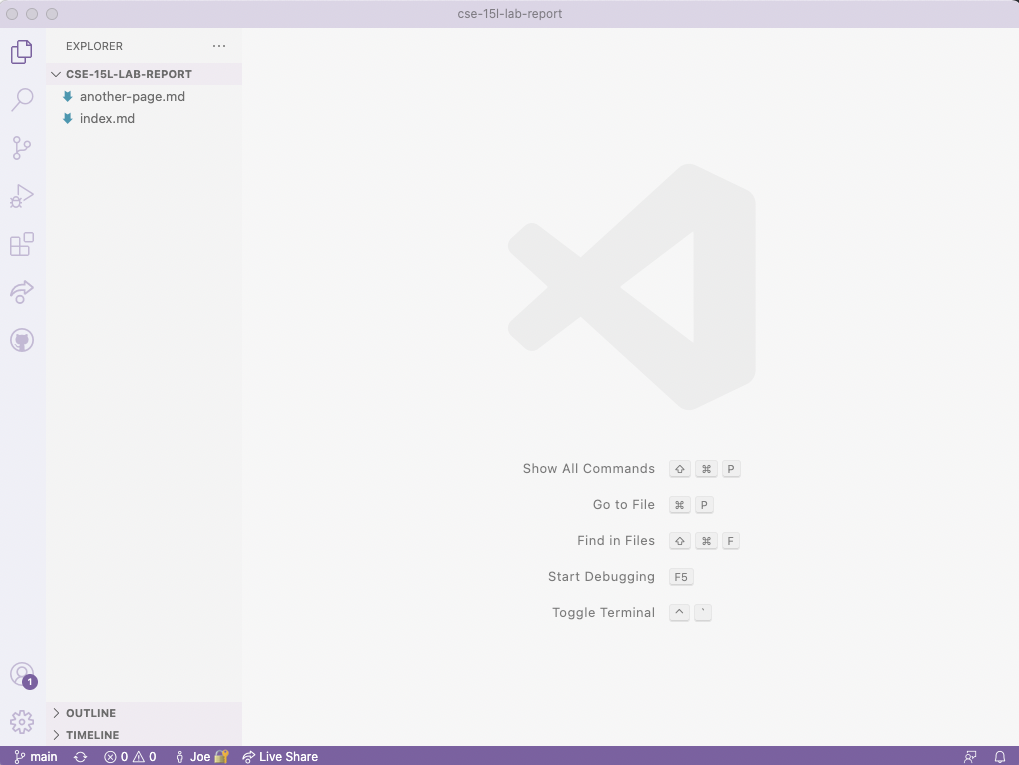
Here’s where VSCode comes in handy – open one of the files and look in the top right corner of the window. There should be a few little symbols, one that looks like two panels with a magnifying glass over the right panel
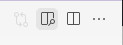
Click it, and a live-updating preview of the rendered Markdown will appear!
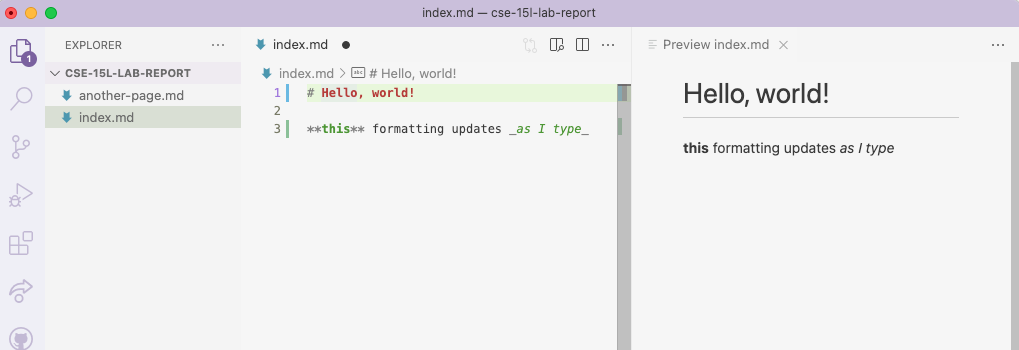
How cool! Make a few edits here; add some text, try out the live formatting. Then make sure to save the file.
Pushing Changes Back
Go back to the Github Desktop window. Now you should see something like this:
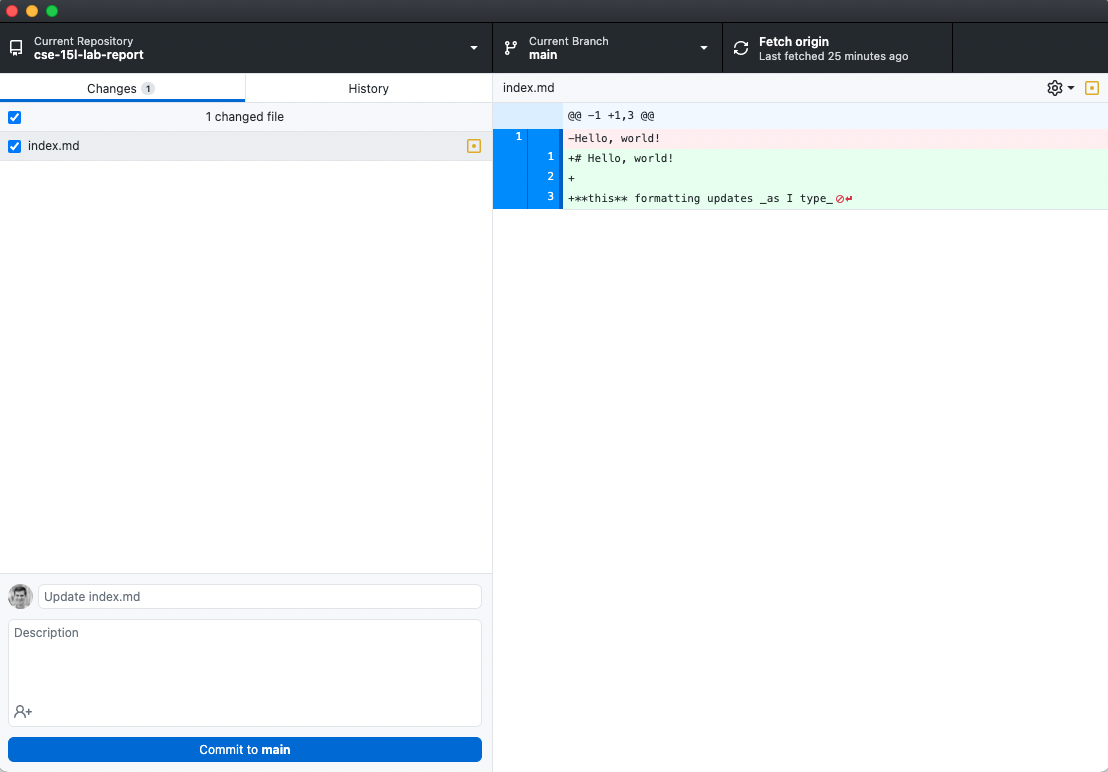
This view is called a diff, and it’s showing a summary of what changed. In red, with - signs next to them, are lines that I removed from the file. In green, with + signs next to them, are lines that I added to the file. This is for us to review before we do two further steps:
- commit the changes to save them to our local copy of the repository
- push the changes to save them to the remote copy of the repository
If you’re happy with your updates, click “Commit to main”. Above that button there’s also a box where you can write a short message for your own bookkeeping about why you made this change; in this case you might write “trying out formatting” or similar.
In this case (unlike in the Github interface in your browser) this commit action only makes changes on your computer’s copy of the repository. If you opened up Github right at this moment you will see that these changes are not shown on Github yet.
A separate step takes our committed changes and pushes them to Github to store them in the remote repository. You’ll see a message prompting you to do this on the right-hand side in Github Desktop:

This message uses the term origin to refer to the remote repository. After clicking this, you can verify that the changes did in fact show up when you view your repository’s code on Github. Shortly, you should also see your web page update with the newly-written or changed text.
Setting Up a Web Page
For your lab report (see below) there are a few key features we need to make sure we practice.
Including Screenshots
One important part of setting up lab reports in this class will be including screenshots of your work on the page, which means:
- Taking and saving the screenshot
- Adding the image to the repository
- Adding the right Markdown to include the image
Get your first lab report started by making a new file called lab-report-1-week-0.md. Then, find an image on your computer, like a screenshot from last week’s lab, maybe, or a new screenshot you take now. Copy or move that image file into your repository that you have open in VScode (you can drag and drop it into the file explorer).
Then, add an image tag (use the Markdown cheat sheet!) to refer to that image in lab-report-1-week-0.md. Commit the changes to that file along with the image, and push to Github. Verify that you can see the image in the published version of your site.
Adding Links
One thing that’s helpful on pages like yours is to have links between pages. Add a link to the index page of your site that points to your lab report page. Which of the following styles works?
[Lab Report 1](lab-report-1-week-0.html)[Lab Report 1](https://<your-username>.github.io/<your-lab-reports-repo>/lab-report-1-week-0.html)
Having Fun – Themes
Feel free to get creative with your page. Github has free themes you can use.
You can also read more about Jekyll, a tool Github Pages uses to turn your markdown files into web pages.
In general, if you want, feel free to do as much styling, editing, theming, etc as you want with your page – it’s yours!
Submission
When you’re done, visit Gradescope and submit to the Week 0 Lab Submission assignment. Finish before class on Wednesday so we’ll be set up for labs (and lab reports!) going forward.